[N-World Contents] [Book Contents] [Prev] [Next] [Index]
Using Saturn Express
Hardware Requirements
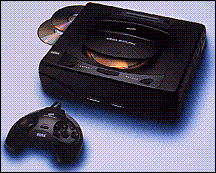
In addition to a Sega Saturn, the Saturn Express requires a Sega CartDev, Rev. B.
Saturn Express supports conversion of game content data for real-time display on the Sega Saturn. This includes:
Saturn Express has the following parameters for object and texture map data:
The Saturn Express Process
Saturn express is designed to provide real-time feedback to you, the artist, about how your objects will look on the Sega Saturn. The speed with which objects can be ported from N·World to the Sega Saturn allows for real-time, interactive design of objects and materials. You can export object geometry, and materials data to SGL files, which can in turn be compiled and viewed on the Sega Saturn.
Here's how the process works:
1. Model your objects in N-Geometry.
2. Create materials in the Attributes Editor.
- Materials you wish to use in the Sega Saturn should be defined using the Sega render domain, whose attributes and parameters are described elsewhere in this book.
3. Use the Browser to associate materials and mappers with your objects.
4. Redisplay your 3D object in N·World in real time, using the SGI GL Shade hardware renderer.
- Redisplay allows you to get your objects looking the way you want on the SGI, before you export anything.
5. Export and display the objects on the Sega Saturn.
- With a simple click of a button, send your object to the Sega Saturn. You can fine tune it's appearance on the game platform itself by adjusting attributes and sending it over again.
6. When everything looks right, you can write the object and it's associated materials to file with a simple command.
When you preview an object or an animation, the data are compiled and sent to the Nintendo directly When you export an object, the data are written to ASCII text files, which can then be compiled and sent to the Sega Saturn.
A Note about Tutorial Files
We'll be loading files from N·World demo directories during the course of this tutorial. When N·World is distributed, these directories are generally write-protected. This means that you might not be able to save your materials or other files to these directories. When you are saving objects, materials, or other items, make sure to specify a directory for which you have adequate write permissions (your home directory, symbolized with a tilde (~) is often a good choice). If you have any questions about the configuration of your particular site, consult your System Administrator.
Output from the Sega Saturn can be channelled to an SGI Capture window. Of course, you can also send output to a TV monitor.
1. Open a UNIX shell and type in the following command.
unix%capture &
2. When the Capture window appears, (CLICK-L) on Tools>Video Panel.
- The Video control panel appears:
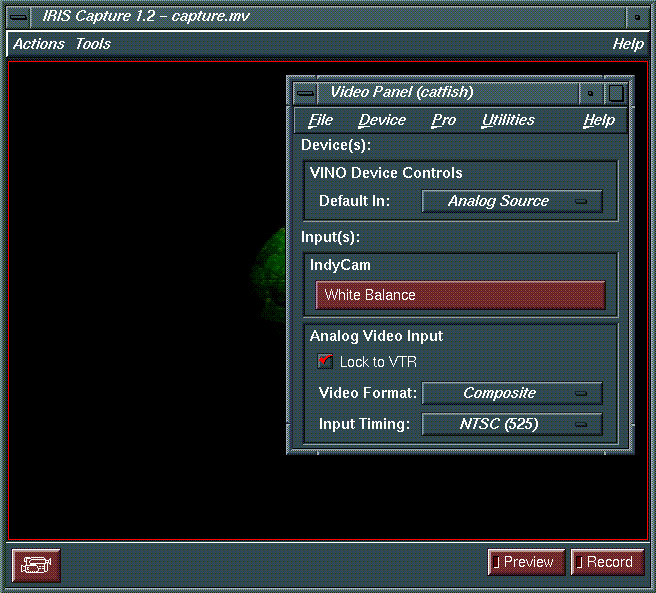
Figure 2.1 Configuring the Capture screen
3. Change the Default In: parameter to Analog Source.
- Now, objects you're previewing on the Sega Saturn will appear in this capture window.
Creating and Preparing Objects and Materials
1. In the GeoMenus, (CLICK-L) on New Object>sphere.
2. In the GeoMenus, (CLICK-L) on New Object>mapper.
- Create a spherical mapper, and set the bounds source for the mapper to your new sphere. Your mapper parameters should look like this:
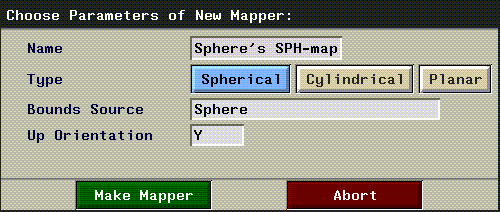
Figure 2.2 Spherical mapper parameters
3. In the GeoMenus, (CLICK-L) on Shading, then select your object from the menu which appears.
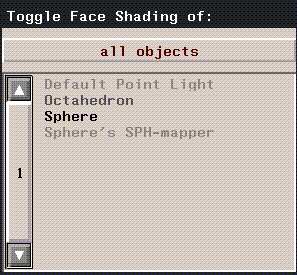
Figure 2.3 Toggling shading for Geometry objects
4. Open the Browser, then (CLICK-L) on the Geo button.
- The Browser shows all the objects currently loaded into Geometry, and also provides a visual representation of object hierarchy:
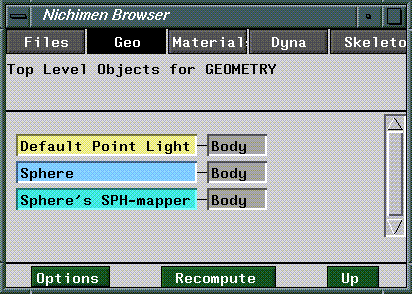
Figure 2.4 The Browser display
5. In the Browser, (CLICK-R) over your object.
- The Operations menu for your sphere appears.
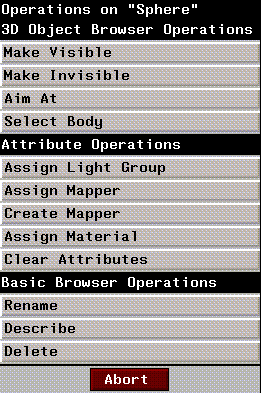
Figure 2.5 The Browser Operations menu for sphere
- Note: If your Browser doesn't show all the objects in the Geometry window, (CLICK-L) on Recompute to refresh the Browser display.
6. (CLICK-L) on Assign Mapper.
- A pop-up menu appears listing the mappers you've created. (CLICK-L) on the spherical mapper you created in step 2.
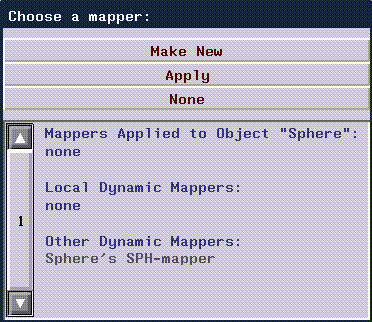
Figure 2.6 Assigning a mapper using the Browser
- The browser display changes to reflect the mappers new association with your sphere.
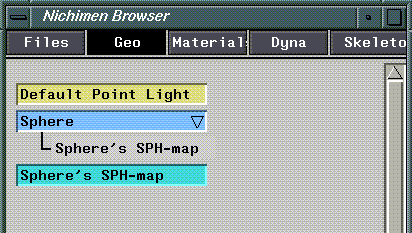
Figure 2.7 Mapper associated with an object in the Browser
7. Open the Attributes Editor.
8. (CLICK-L) on New to create a new material.
- Enter a directory and filename for your new material in the dialog box which appears:

Figure 2.8 Creating a new material
- Icons for your new material appear in the Attributes Editor (Figure 2.9)
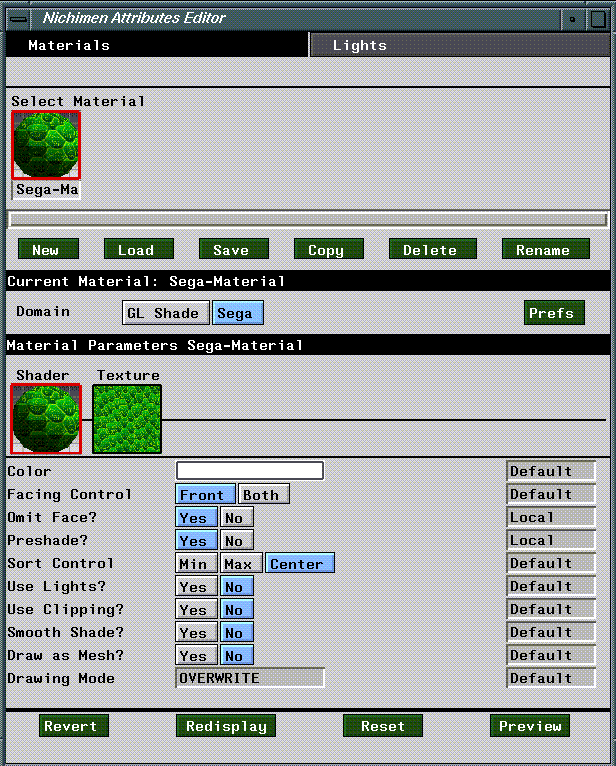
Figure 2.9 Sega render domain attributes editor menu
9. (CLICK-L) on the Sega button.
- This selects the Sega domain as the current render domain, and reveals the Sega domain attribute menus (Figure 2.9).
- Note: The Sega domain is specially designed for attributing objects for display on the Sega Saturn. You should read Chapter 3 and become familiar with Sega attributes and defaults.
10. (CLICK-L) on Texture.
- The Attributes menu will change to reflect Sega texture map attributes.
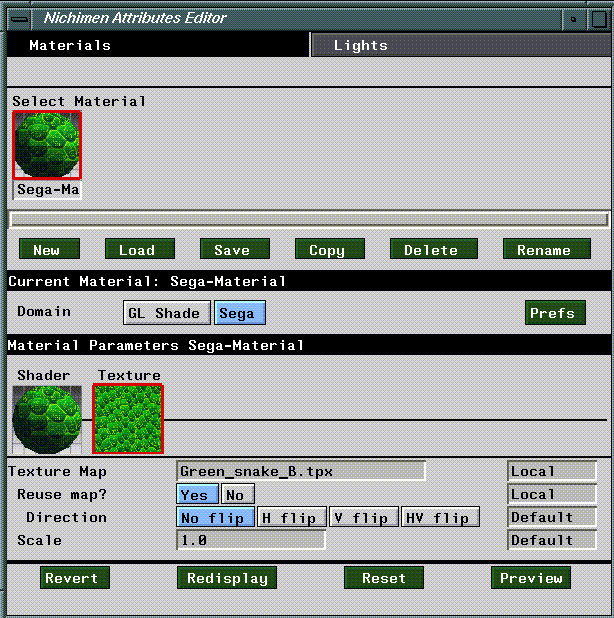
Figure 2.10 Sega domain Texture map attributes
11. (CLICK-L) on the Texture Map field, and select the following texture map file:
/usr/local/ngc/presets/maps/Green_snake_B.tpx
12. In the Browser, (CLICK-R) on your sphere.
- The Operations menu appears again.
13. (CLICK-L) on Assign Material.
- A menu appears listing all materials loaded into memory. (CLICK-L) on the material you just created.
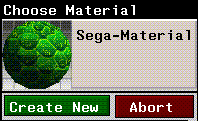
Figure 2.11 Selecting and assigning a material
- The browser will prompt you to select a mapper for any texture maps associated with the material.
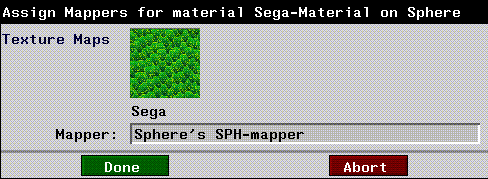
Figure 2.12 Assigning a texture map to a mapper in the Browser
14. (CLICK-R) on the Mapper field, then (CLICK-L) on the Spherical mapper you created in step 2.
- The browser window should now show the sphere and its mapper, as well as the material you just assigned it.

Figure 2.13 The Browser with mapper and material assigned to Sphere
15. In the Attributes Editor, (CLICK-L) on Redisplay.
- Your sphere should appear in the Geometry window with the green snake scales applied to it.
16. Now, (CLICK-L) on Preview in the Attributes Editor.
- The object should appear on the Capture window we set up earlier, or on the video monitor attached to your SGI.
- Note: The Preview function exports all objects visible in the Geometry window to the Sega Saturn.
That's all there is to it! Essentially, previewing objects on the Sega Saturn is no different from ordinary render operations.
When you export an object from N-Geometry to Sega SGL format, all materials you associated with that object in the Browser are exported as well. Be sure that you've assigned materials to your objects before exporting them. To learn how to assign materials to objects and face parts, see the Attributes Editor User's Guide.
To export an object:
1. (Click-L) on Export in the GeoMenu.
2. Choose the object you want to export from the object list that appears.
3. Choose Sega SGL from the Choose Export Format pop-up menu.
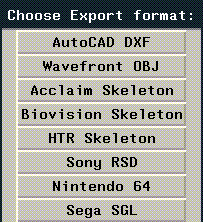
Figure 2.14 The Choose Export format pop-up menu
4. Specify a directory and filename for your SGL file. Approriate extensions are automatically appended to each filename.

Figure 2.15 Choose filename
- Global? controls how the Saturn treats object hierarchies:
5. (Click-L) on Write Object File.
- When you write the object, several files are created; for example, if you were writing out an object named "octahedron" you'd get the following files:
Compiling a File
If you installed the compiler as described in the accompanying installation instructions, you can now compile the generated c files into a stand-alone COFF file (which can be loaded and viewed using any COFF viewer).
To compile a file:
1. Copy the following files into the directory where you want to compile the files:
/usr/local/ngc/plugin/sega/Makefile
- Originally installed in the Sega plugin directory.
/usr/local/ngc/plugin/sega/nichimen.lnk
- Information for the linker.
2. Make sure you have the following links:
ln -s /usr/local/bin/sh-hms-ld ld
ln -s /usr/local/bin/sh-hms-ar ar
ln -s /usr/local/bin/sh-hms-as as
3. Edit the Makefile.
- Change the following line so that it contains the .c files you generated in step 5 above:
SRCS = octahedron-main.c octahedron-polygon.c octahedron-texture.c
4. Make sure your .cshrc includes the following path variable:
set path=($path /usr/local/bin)
5. Make the file:
make
6. This creates the following COFF file:
nichimen.cof
Viewing the COFF File
On a PC
Use the standard Sega development tools on the PC supplied by Snasm.
1. Evaluate the following LISP forms after you have evaluated (sega:start-sega) or have evaluated (sega:Segafy) at least once during the current session.
(sega:load-coff "/directory/nichimen.cof" t)
(sega:go-sega)
- Note. Make sure you're in debug mode, as described in "Starting in Debug Mode," on page 4-2.
- Note. When sending COFF files, the Sega may "hang." If it does, simply send another (sega:start-sega command to reset the box.
POLYGON.C File
Write xyz coordinates for all vertices:
POINT point_cube[] = {
POStoFIXED(-15.0,-15.0,-15.0),
POStoFIXED(-15.0,-15.0, 15.0),
POStoFIXED(-15.0, 15.0,-15.0),
POStoFIXED(-15.0, 15.0, 15.0),
POStoFIXED( 15.0,-15.0,-15.0),
POStoFIXED( 15.0,-15.0, 15.0),
POStoFIXED( 15.0, 15.0,-15.0),
POStoFIXED( 15.0, 15.0, 15.0),
};
Write face normal in xyz coordinates and face definition list in vertex numbers:
POLYGON polygon_cube[] = {
NORMAL(-1.0, 0.0, 0.0), VERTICES(0,1,3,2),
NORMAL( 0.0, 0.0, 1.0), VERTICES(1,5,7,3),
NORMAL( 1.0, 0.0, 0.0), VERTICES(5,4,6,7),
NORMAL( 0.0, 0.0,-1.0), VERTICES(4,0,2,6),
NORMAL( 0.0,-1.0, 0.0), VERTICES(4,5,1,0),
NORMAL( 0.0, 1.0, 0.0), VERTICES(2,3,7,6),
};
Write out face attribute list.
ATTR attribute_cube[] = {
ATTRIBUTE(Single_Plane,SORT_MIN,No_Texture,C_RGB(31,31,00),
No_Gouraud,MESHoff,sprPolygon,UseLight),
ATTRIBUTE(Single_Plane,SORT_MIN,No_Texture,C_RGB(31,00,00),
No_Gouraud,MESHoff,sprPolygon,UseLight),
ATTRIBUTE(Single_Plane,SORT_MIN,No_Texture,C_RGB(00,31,00),
No_Gouraud,MESHoff,sprPolygon,UseLight),
ATTRIBUTE(Single_Plane,SORT_MIN,No_Texture,C_RGB(00,00,31),
No_Gouraud,MESHoff,sprPolygon,UseLight),
ATTRIBUTE(Single_Plane,SORT_MIN,No_Texture,C_RGB(31,00,31),
No_Gouraud,MESHoff,sprPolygon,UseLight),
ATTRIBUTE(Single_Plane,SORT_MIN,No_Texture,C_RGB(00,31,31),
No_Gouraud,MESHoff,sprPolygon,UseLight),
};
Write out object structure. Include the point list, face list, and attribute list:
PDATA PD_cube = {
point_cube,sizeof(point_cube)/sizeof(POINT),
polygon_cube,sizeof(polygon_cube)/sizeof(POLYGON),
attribute_cube
};
Texture Example (POLYGON.C)
#include "sgl.h"
#define PN_SONIC 0
#define PN_AM2 1
POINT point_plane[] = {
POStoFIXED(-40.0 , -40.0 , 0.0) ,
POStoFIXED( 40.0 , -40.0 , 0.0) ,
POStoFIXED( 40.0 , 40.0 , 0.0) ,
POStoFIXED(-40.0 , 40.0 , 0.0)
};
POLYGON polygon_plane[] = {
NORMAL(0.0,0.0,1.0), VERTICES(0 , 1 , 2 , 3)
};
ATTR attribute_plane[] = {
ATTRIBUTE(Single_Plane, SORT_CEN, PN_SONIC, No_Palet, No_Gouraud, CL32KRGB|MESHoff, sprNoflip, No_Option),
};
PDATA PD_PLANE = {
point_plane , sizeof(point_plane)/sizeof(POINT),
polygon_plane, sizeof(polygon_plane)/sizeof(POLYGON),
attribute_plane
};
Texture Example (TEXTURE.C)
#include "sgl.h"
TEXDAT sonic_64x64[]={
0xffff, 0xffff, 0xffff, 0xffff, 0xffff, 0xffff, 0xffff, 0xffff,
0xffff, 0xffff, 0xffff, 0xffff, 0xffff, 0xffff, 0xffff, 0xffff,
0xffff, 0xffff, 0xffff, 0xffff, 0xffff, 0xffff, 0xffff, 0xffff,
0xffff, 0xffff, 0xffff, 0xffff, 0xffff, 0xffff, 0xffff, 0xffff,
0xffff, 0xffff, 0xffff, 0xffff, 0xffff, 0xffff, 0xffff, 0xffff,
0xffff, 0xffff, 0xffff, 0xffff, 0xffff, 0xffff, 0xffff, 0xffff,
0xffff, 0xffff, 0xffff, 0xffff, 0xffff, 0xffff, 0xffff, 0xffff,
0xffff, 0xffff, 0xffff, 0xffff, 0xffff, 0xffff, 0xffff, 0xffff,
0xffff, 0xffff, 0xffff, 0xffff, 0xffff, 0xffff, 0xffff, 0xffff,
0xffff, 0xffff, 0xffff, 0xffff, 0xffff, 0xffff, 0xffff, 0xffff,
0xffff, 0xffff, 0xffff, 0xffff, 0xffff, 0xffff, 0xffff, 0xffff,
0xffff, 0xffff, 0xffff, 0xffff, 0xffff, 0xffff, 0xffdd, 0xfb7b,
0xe292, 0xcd8c, 0xcd8c, 0xd569, 0xd569, 0xd569, 0xd569, 0xddee,
.
.
.
TEXDAT am2_64x32[]={
0xffff, 0xffff, 0xffff, 0xffff, 0xffff, 0xffff, 0xffff, 0xffff,
0xffff, 0xffff, 0xffff, 0xffff, 0xffff, 0xffff, 0xffff, 0xffff,
0xffff, 0xffff, 0xffff, 0xffff, 0xffff, 0xffff, 0xffff, 0xffff,
0xffff, 0xffff, 0xffff, 0xffff, 0xffff, 0xffff, 0xffff, 0xffff,
0xffff, 0xffff, 0xffff, 0xffff, 0x8000, 0x8000, 0x8000, 0x8000,
0x8000, 0xffff, 0xffff, 0xffff, 0xffff, 0xffff, 0xffff, 0xffff,
.
.
.
TEXTURE tex_sample[]={
TEXDEF(64,64,0),
TEXDEF(64,32,64*64*1),
};
PICTURE pic_sample[]={
PICDEF(0,COL_32K,sonic_64x64),
PICDEF(1,COL_32K,am2_64x32),
};
Gouraud Example (POLYGON.C)
#include "sgl.h"
#define GRaddr 0xe000
static POINT point_cube[] = {
POStoFIXED(-20.0 , -20.0 , 20.0) ,
POStoFIXED( 20.0 , -20.0 , 20.0) ,
POStoFIXED( 20.0 , 20.0 , 20.0) ,
POStoFIXED(-20.0 , 20.0 , 20.0) ,
POStoFIXED(-20.0 , -20.0 , -20.0) ,
POStoFIXED( 20.0 , -20.0 , -20.0) ,
POStoFIXED( 20.0 , 20.0 , -20.0) ,
POStoFIXED(-20.0 , 20.0 , -20.0)
};
static POLYGON polygon_cube[] = {
NORMAL( 0.0 , 0.0 , 1.0), VERTICES(0 , 1 , 2 , 3),
NORMAL(-1.0 , 0.0 , 0.0), VERTICES(4 , 0 , 3 , 7),
NORMAL( 0.0 , 0.0 ,-1.0), VERTICES(5 , 4 , 7 , 6),
NORMAL( 1.0 , 0.0 , 0.0), VERTICES(1 , 5 , 6 , 2),
NORMAL( 0.0 ,-1.0 , 0.0), VERTICES(4 , 5 , 1 , 0),
NORMAL( 0.0 , 1.0 , 0.0), VERTICES(3 , 2 , 6 , 7)
};
static ATTR attribute_cube[] = {
ATTRIBUTE(Single_Plane, SORT_MIN, No_Texture, C_RGB(31,16,31), GRaddr, MESHoff|CL_Gouraud, sprPolygon,No_Option),
ATTRIBUTE(Single_Plane, SORT_MIN, No_Texture, C_RGB(31,16,31), GRaddr+1, MESHoff|CL_Gouraud, sprPolygon,No_Option),
ATTRIBUTE(Single_Plane, SORT_MIN, No_Texture, C_RGB(31,16,31), GRaddr+2, MESHoff|CL_Gouraud, sprPolygon,No_Option),
ATTRIBUTE(Single_Plane, SORT_MIN, No_Texture, C_RGB(31,16,31), GRaddr+3, MESHoff|CL_Gouraud, sprPolygon,No_Option),
ATTRIBUTE(Single_Plane, SORT_MIN, No_Texture, C_RGB(31,16,31), GRaddr+4, MESHoff|CL_Gouraud, sprPolygon,No_Option),
ATTRIBUTE(Single_Plane, SORT_MIN, No_Texture, C_RGB(31,16,31), GRaddr+5, MESHoff|CL_Gouraud, sprPolygon,No_Option),
};
PDATA PD_cube = {
point_cube , sizeof(point_cube)/sizeof(POINT),
polygon_cube , sizeof(polygon_cube)/sizeof(POLYGON) ,
attribute_cube
};
[N-World Contents] [Book Contents] [Prev] [Next] [Index]
 Another fine product from Nichimen documentation!
Copyright © 1996, Nichimen Graphics Corporation. All rights
reserved.


 Another fine product from Nichimen documentation!